pipit loungewear set

Hello, and Happy New Year! I hope your 2021 has got off to a great start!

I haven’t had a lot of time to sew for myself over the last few months. I found sewing for my slowly growing pregnancy body to almost be a waste, so I focused my sewing energy on making things for my daughter. However, she is almost 3 months old now, and I’ve been able to find a few minutes to dedicate to some selfish sewing.

MBM_Pipit 01

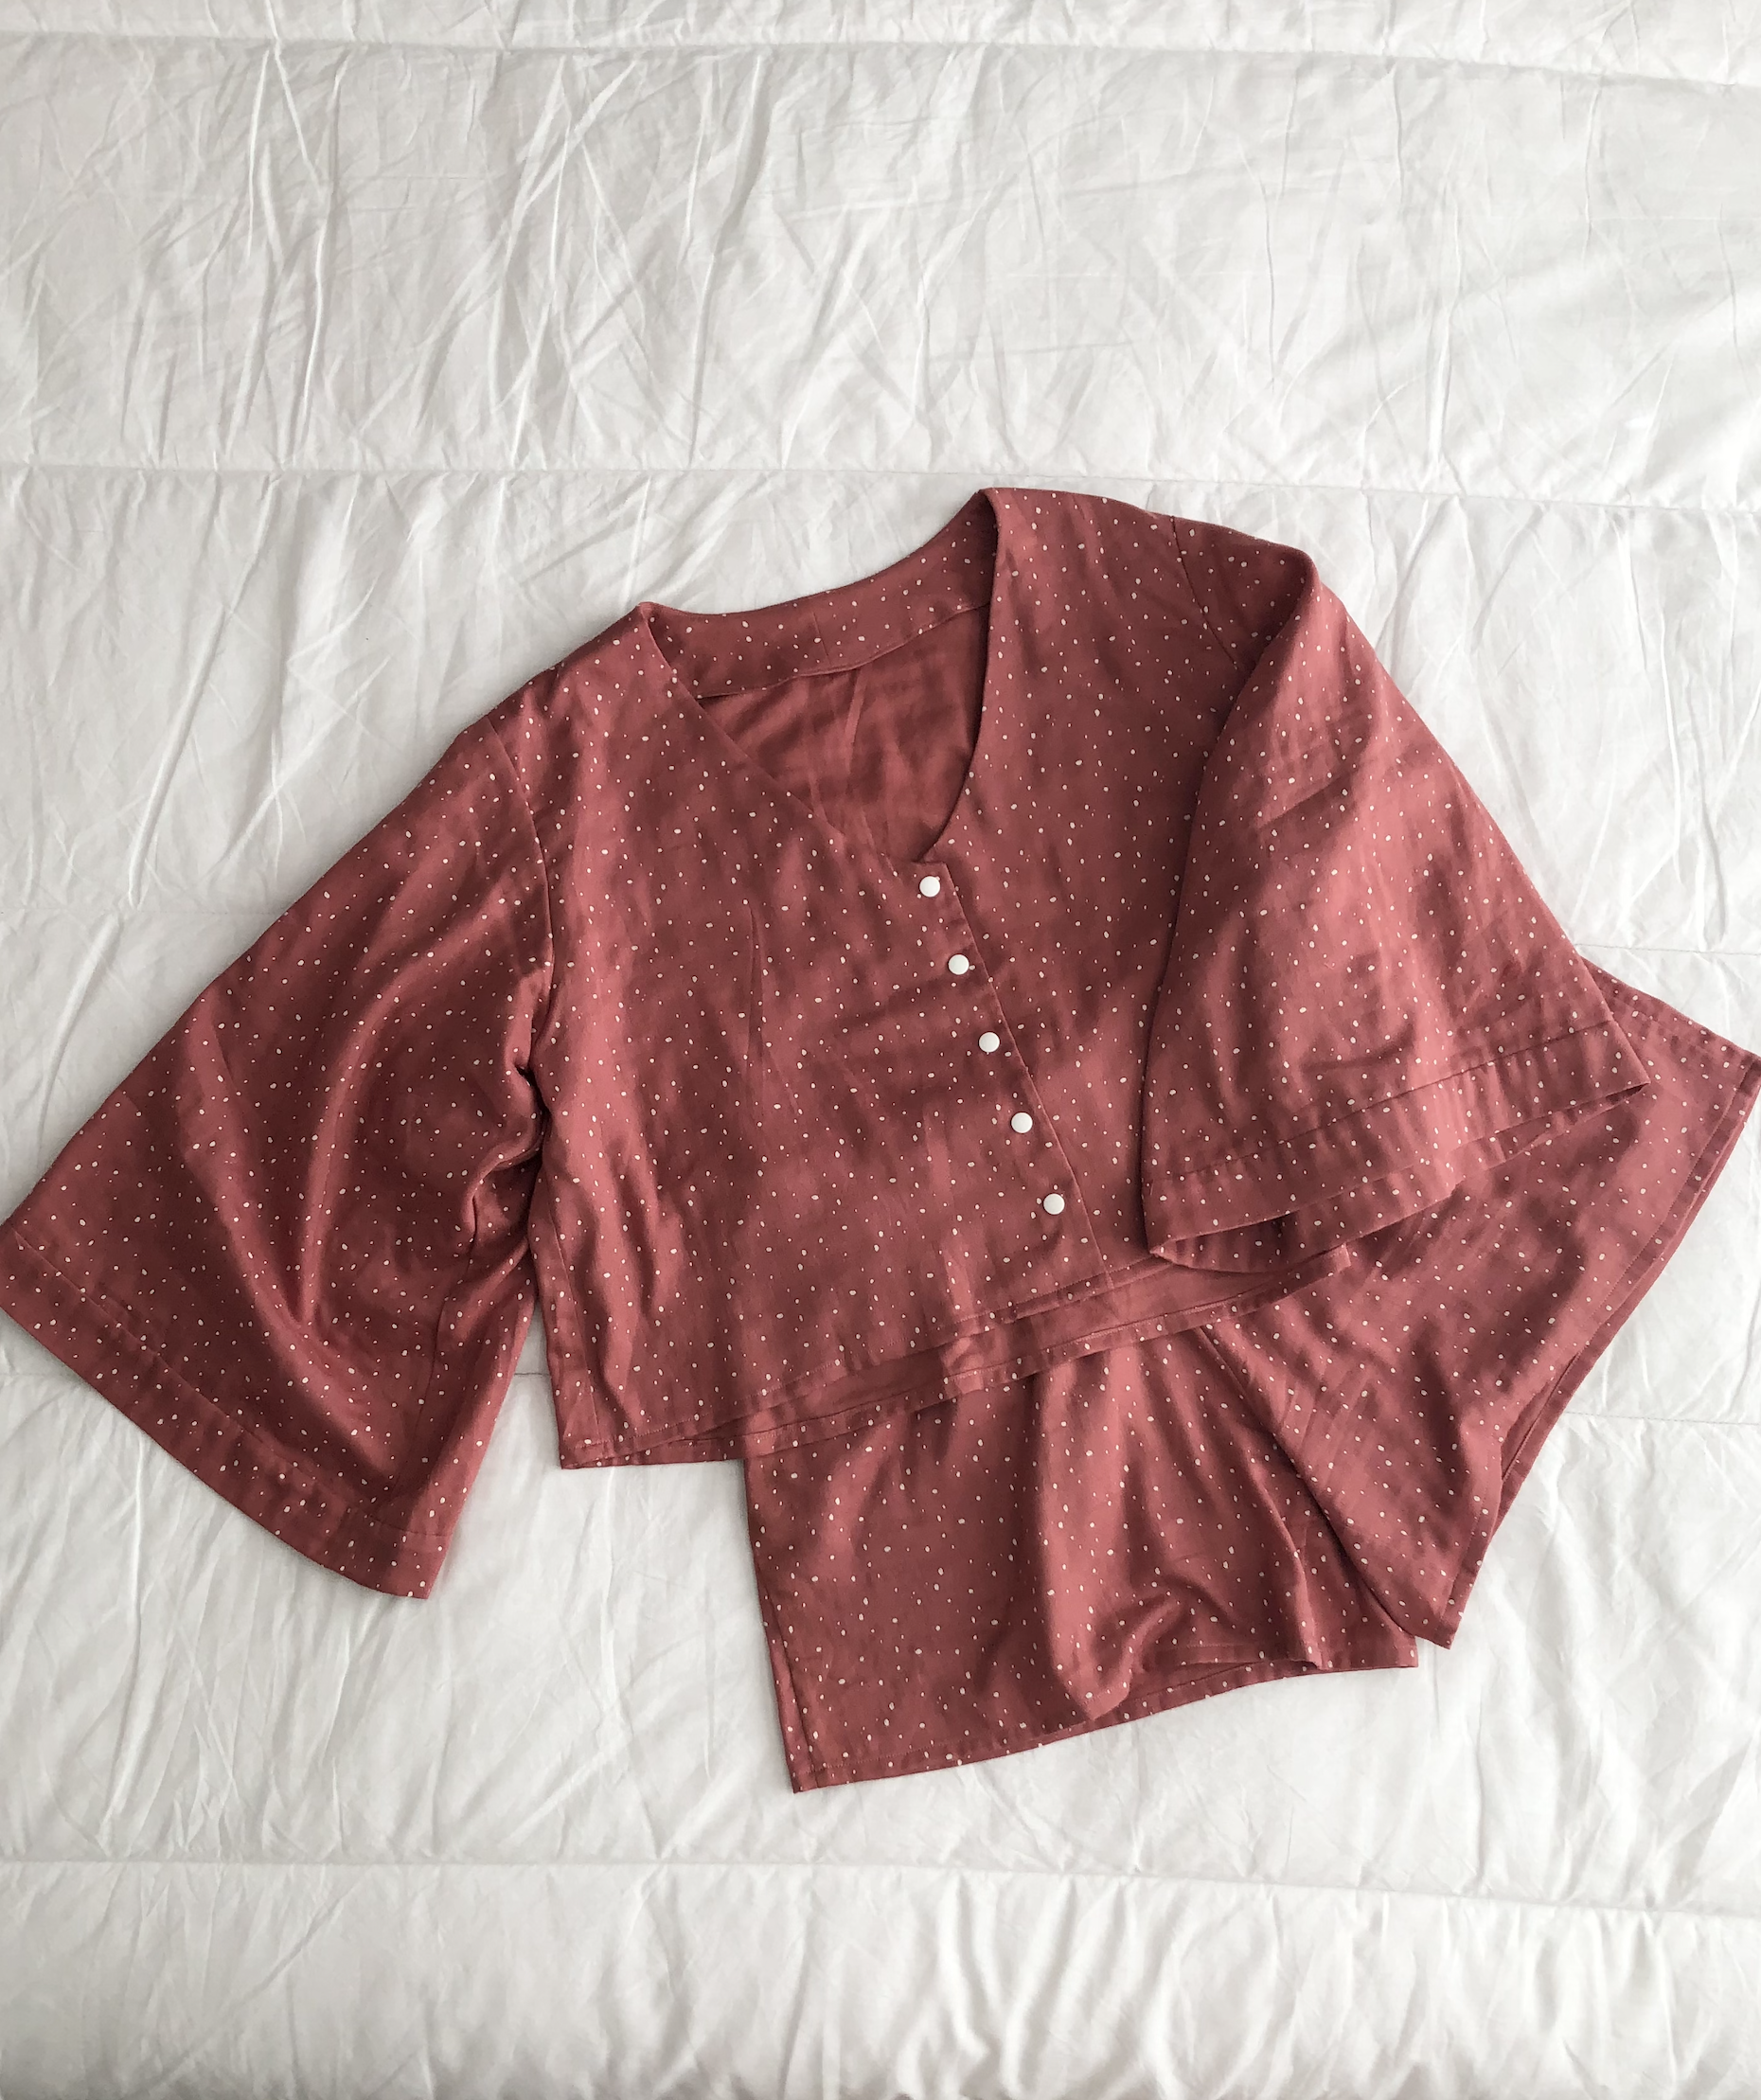
I’ve been wanting to sew the Pipit Loungewear Set by Common Stitch for a while now, and I’m so glad I finally did. It’s a lovely pattern, and the statement sleeves are just a dream! (But beware, they get in EVERYTHING!)

MBM_Pipit 03


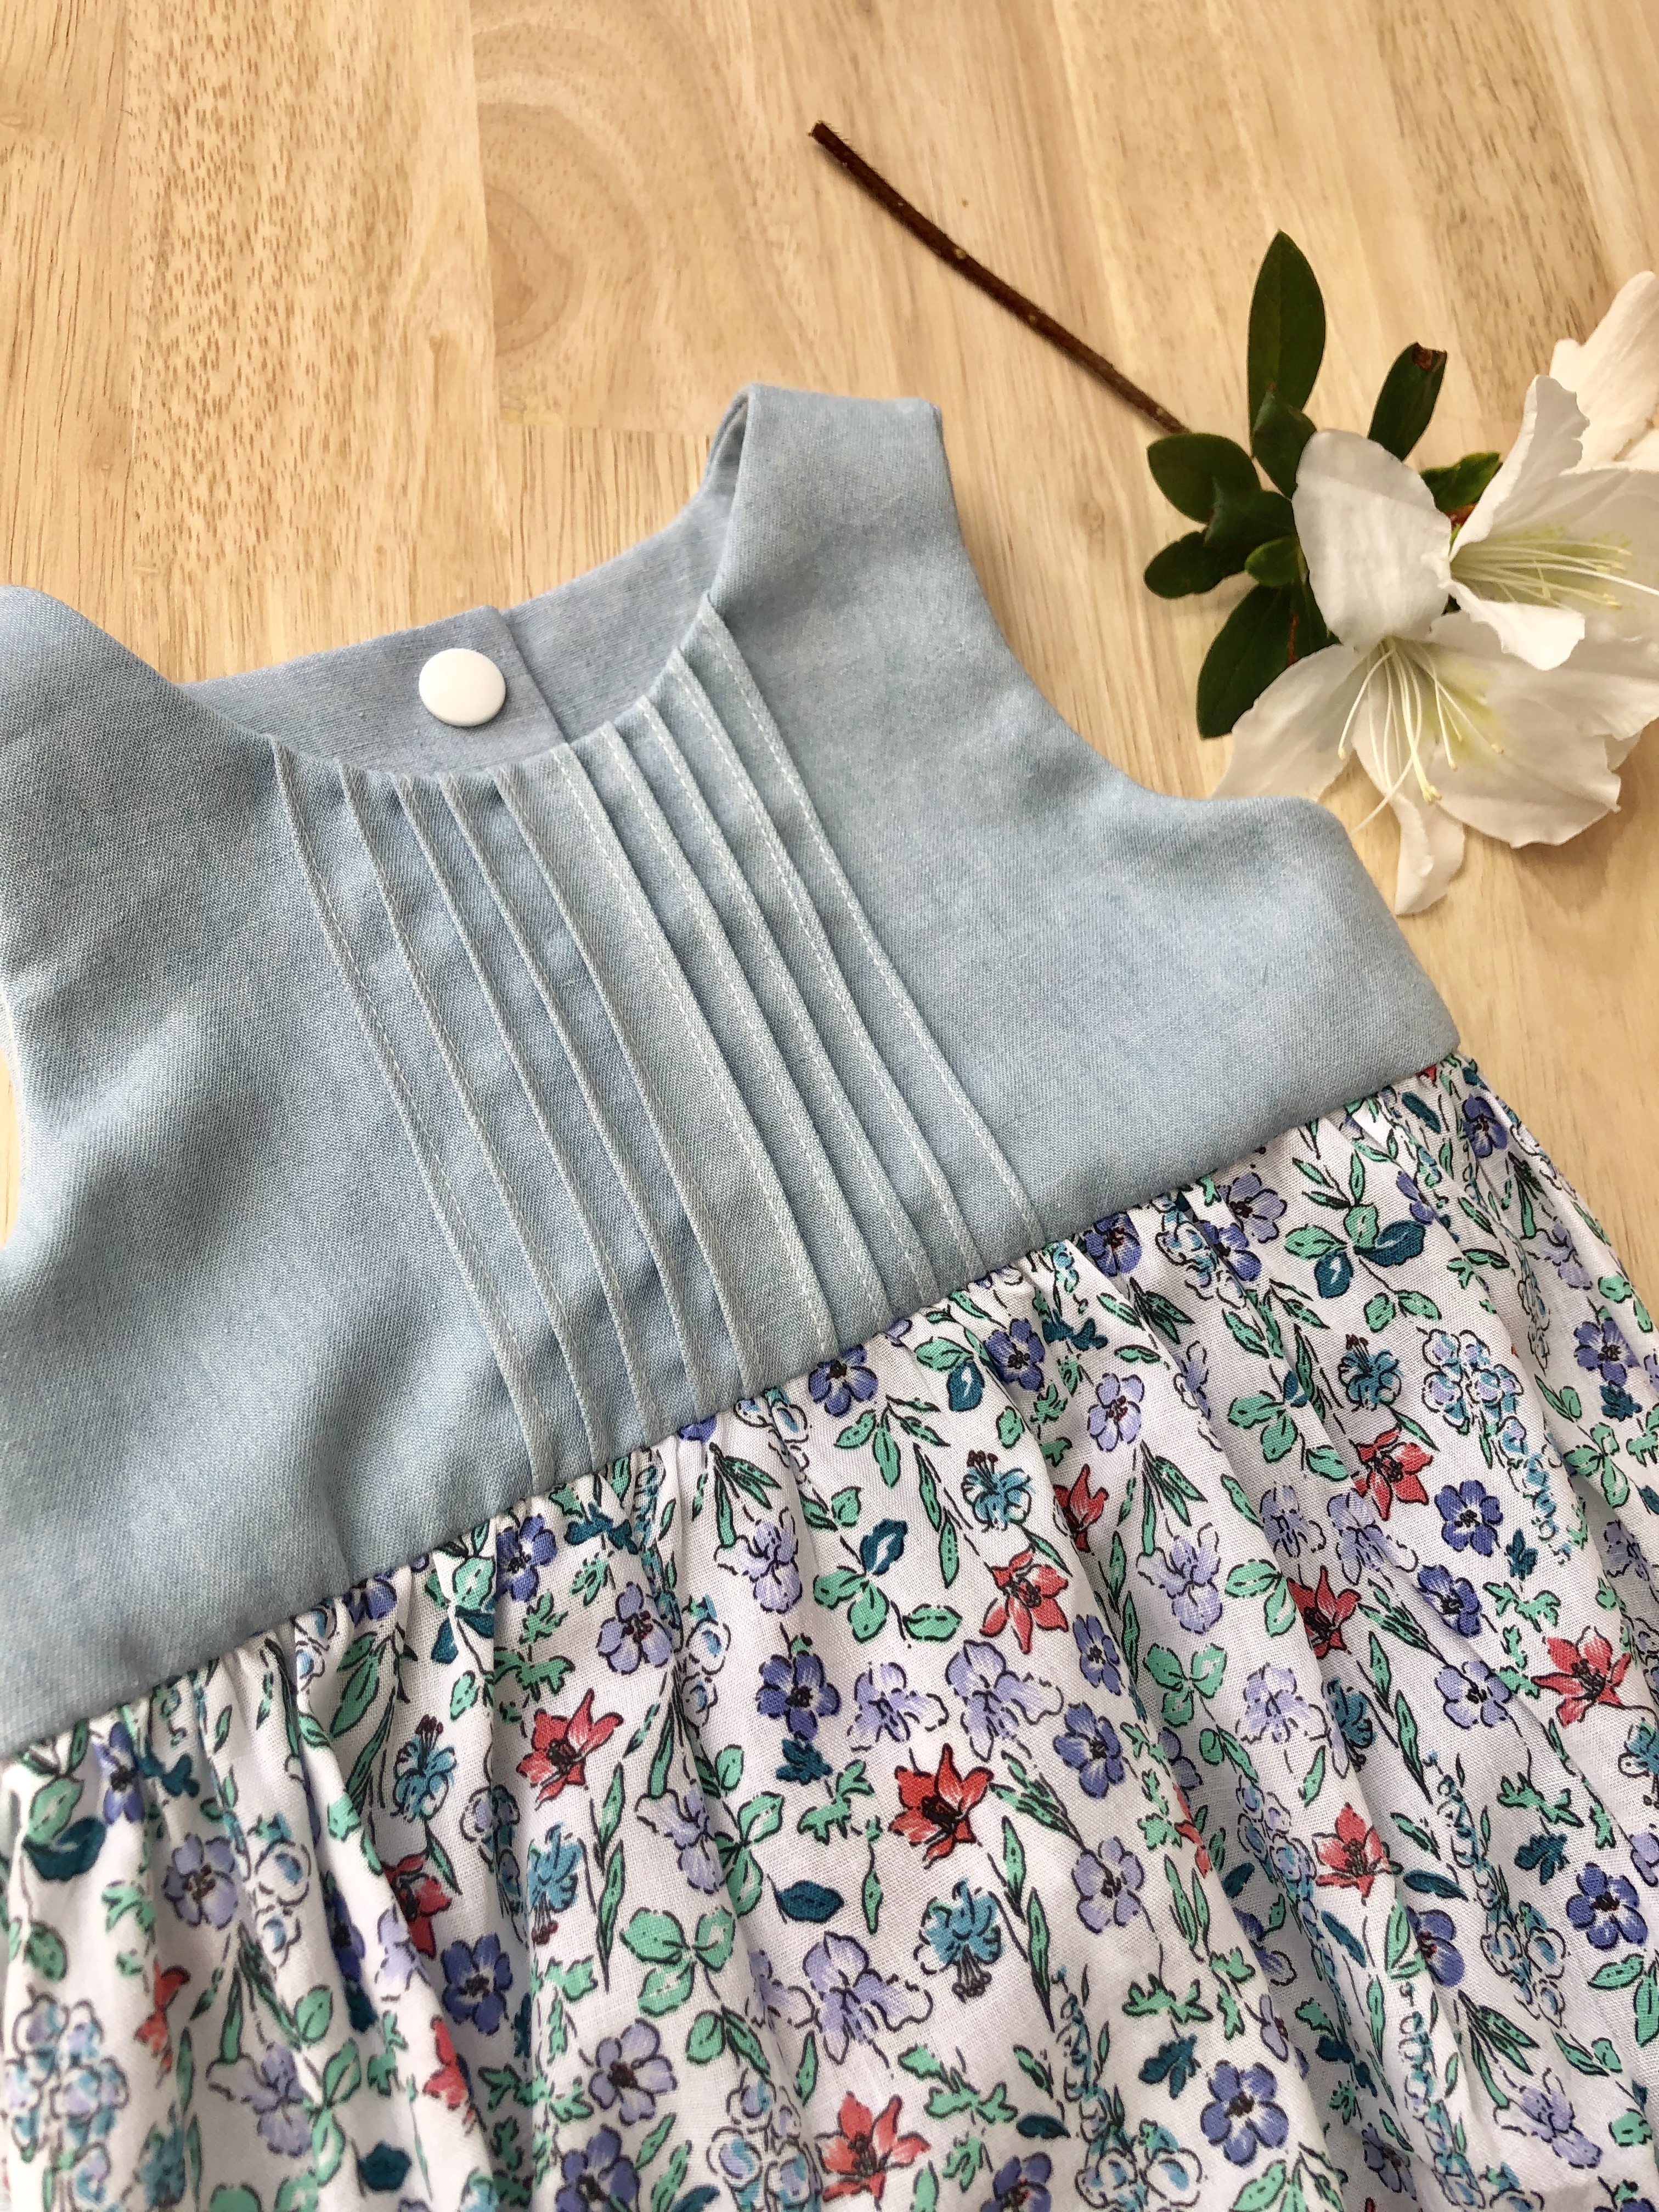
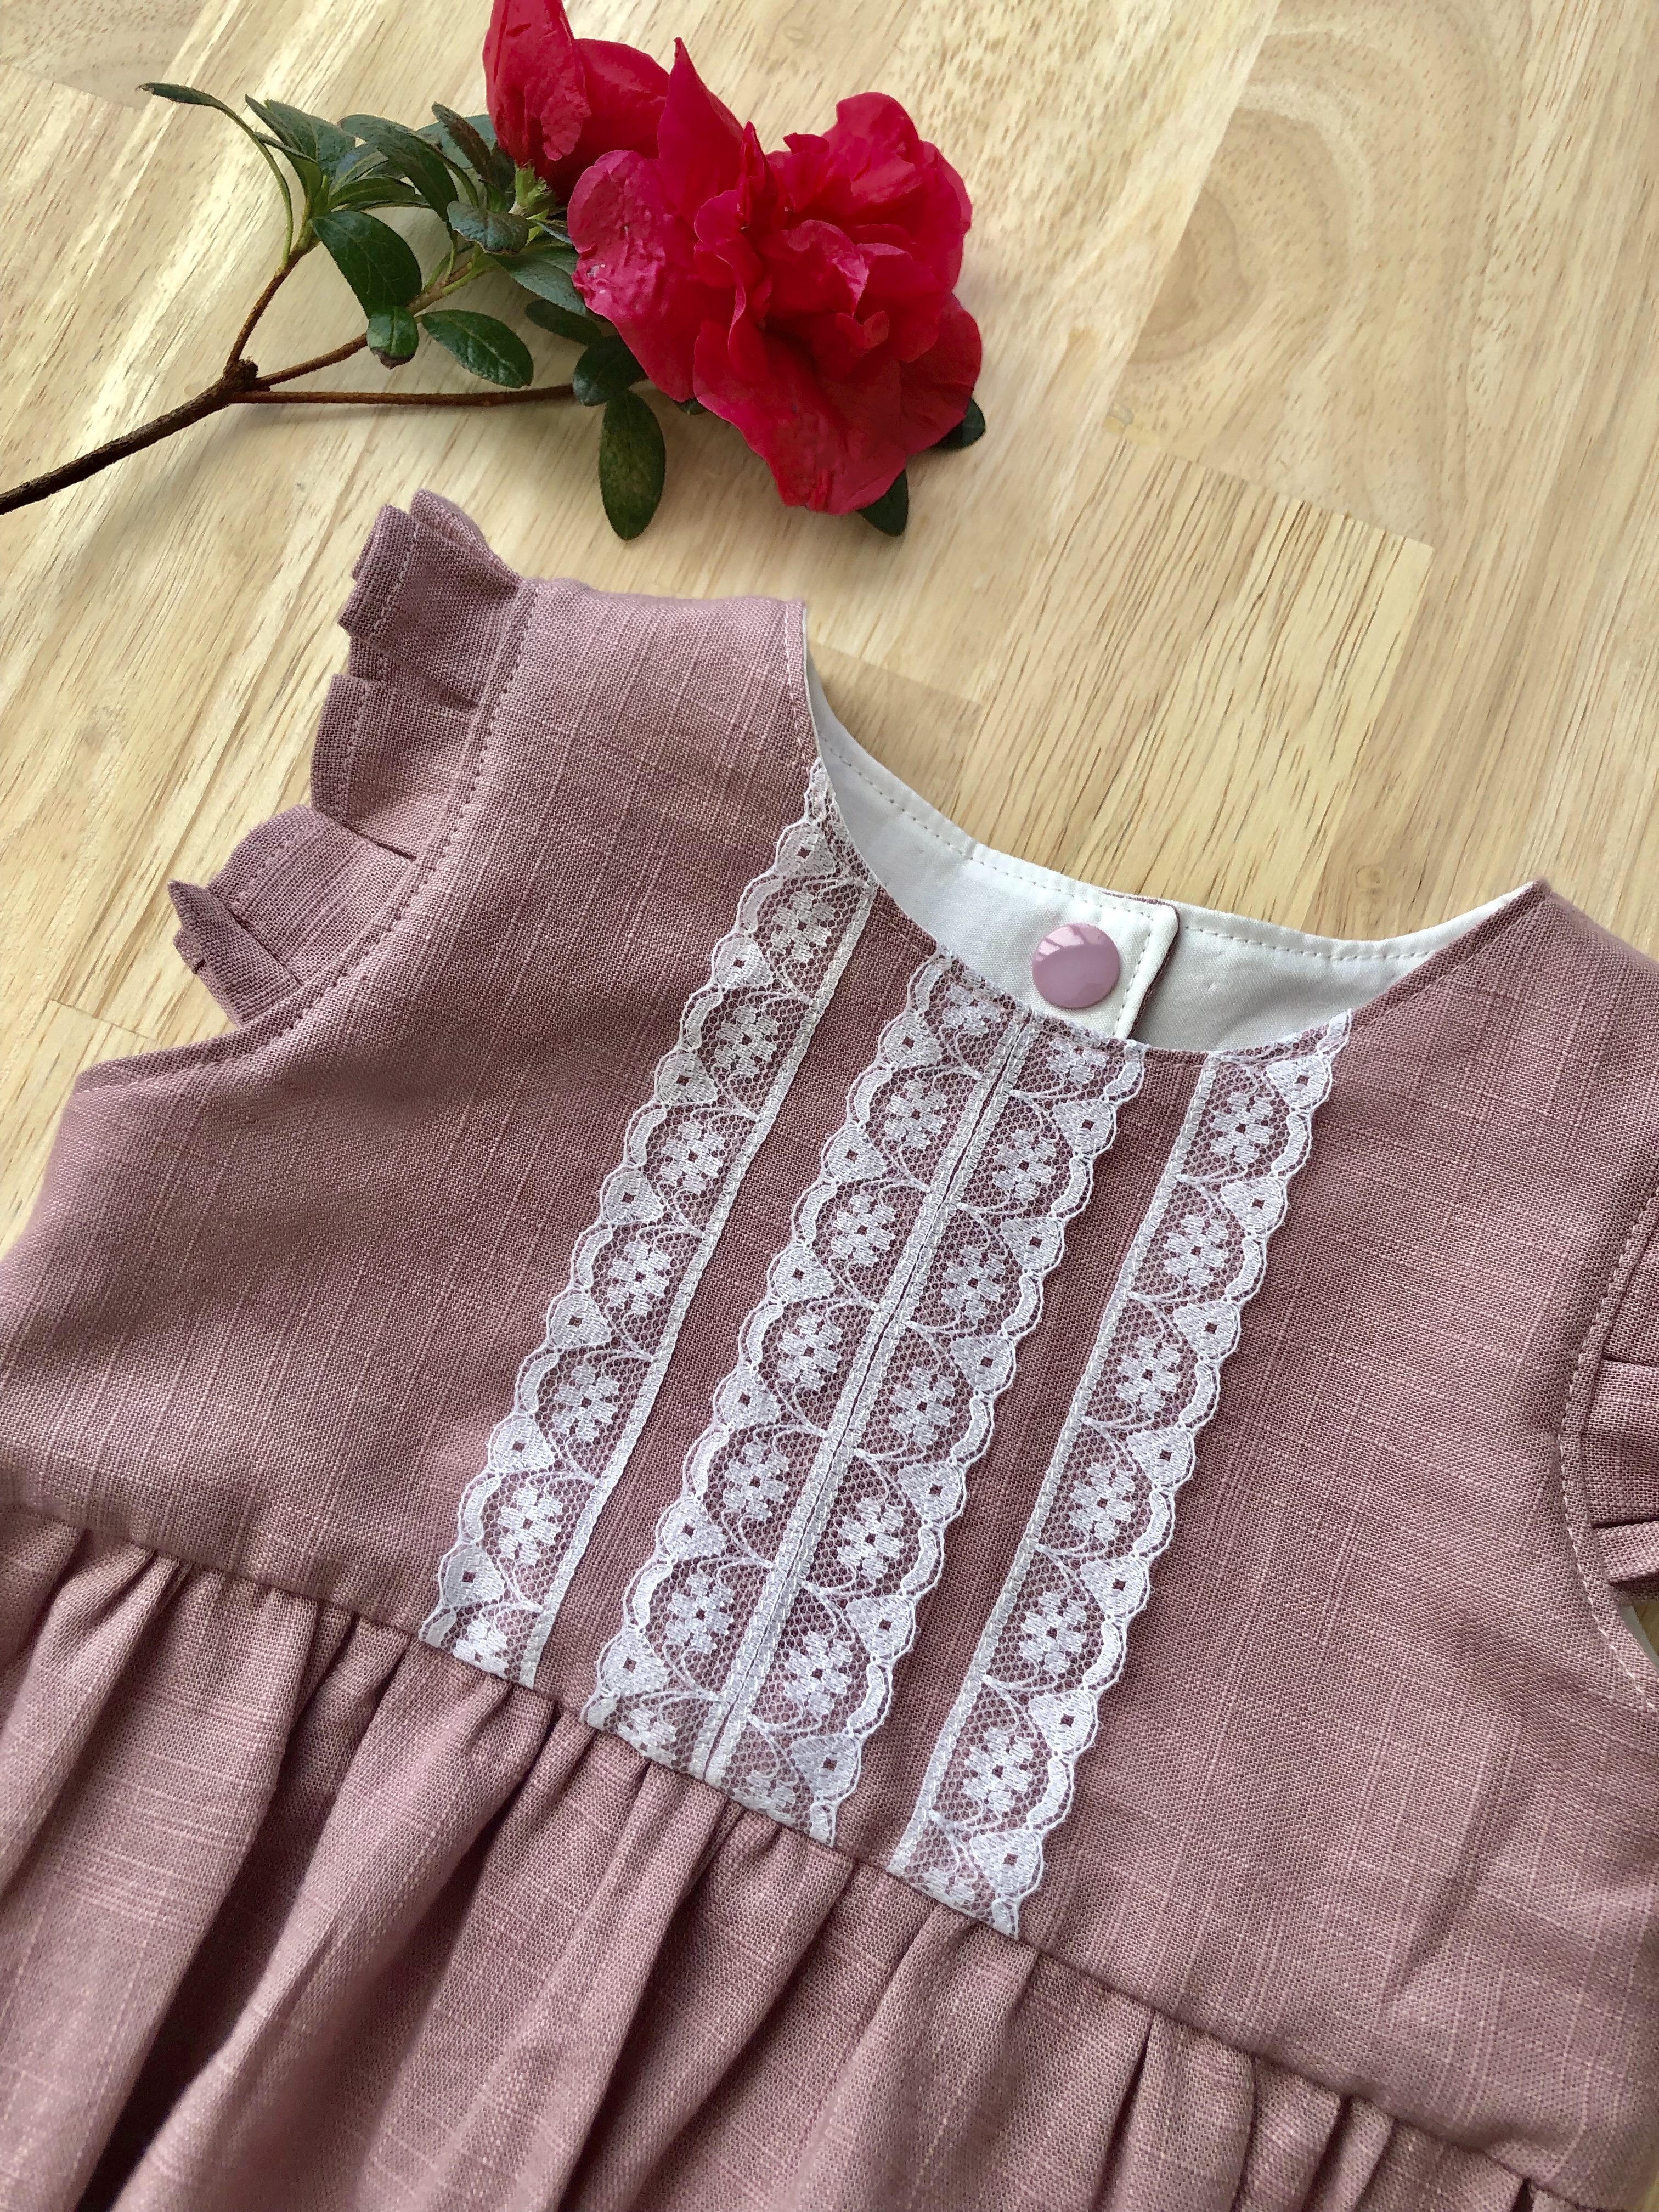
The top is simply drafted, there isn’t even a bust dart. The neckline is finished cleanly with a facing, which I fused with a lightweight interfacing. This also provides a bit more stability to the front closure.

MBM_Pipit 07

The pattern directs you to use buttons for the front closure, but I opted for snaps. These are so easy to instal, they are super strong, and I think they compliment the hail spot print of the fabric nicely.

MBM_Pipit 05

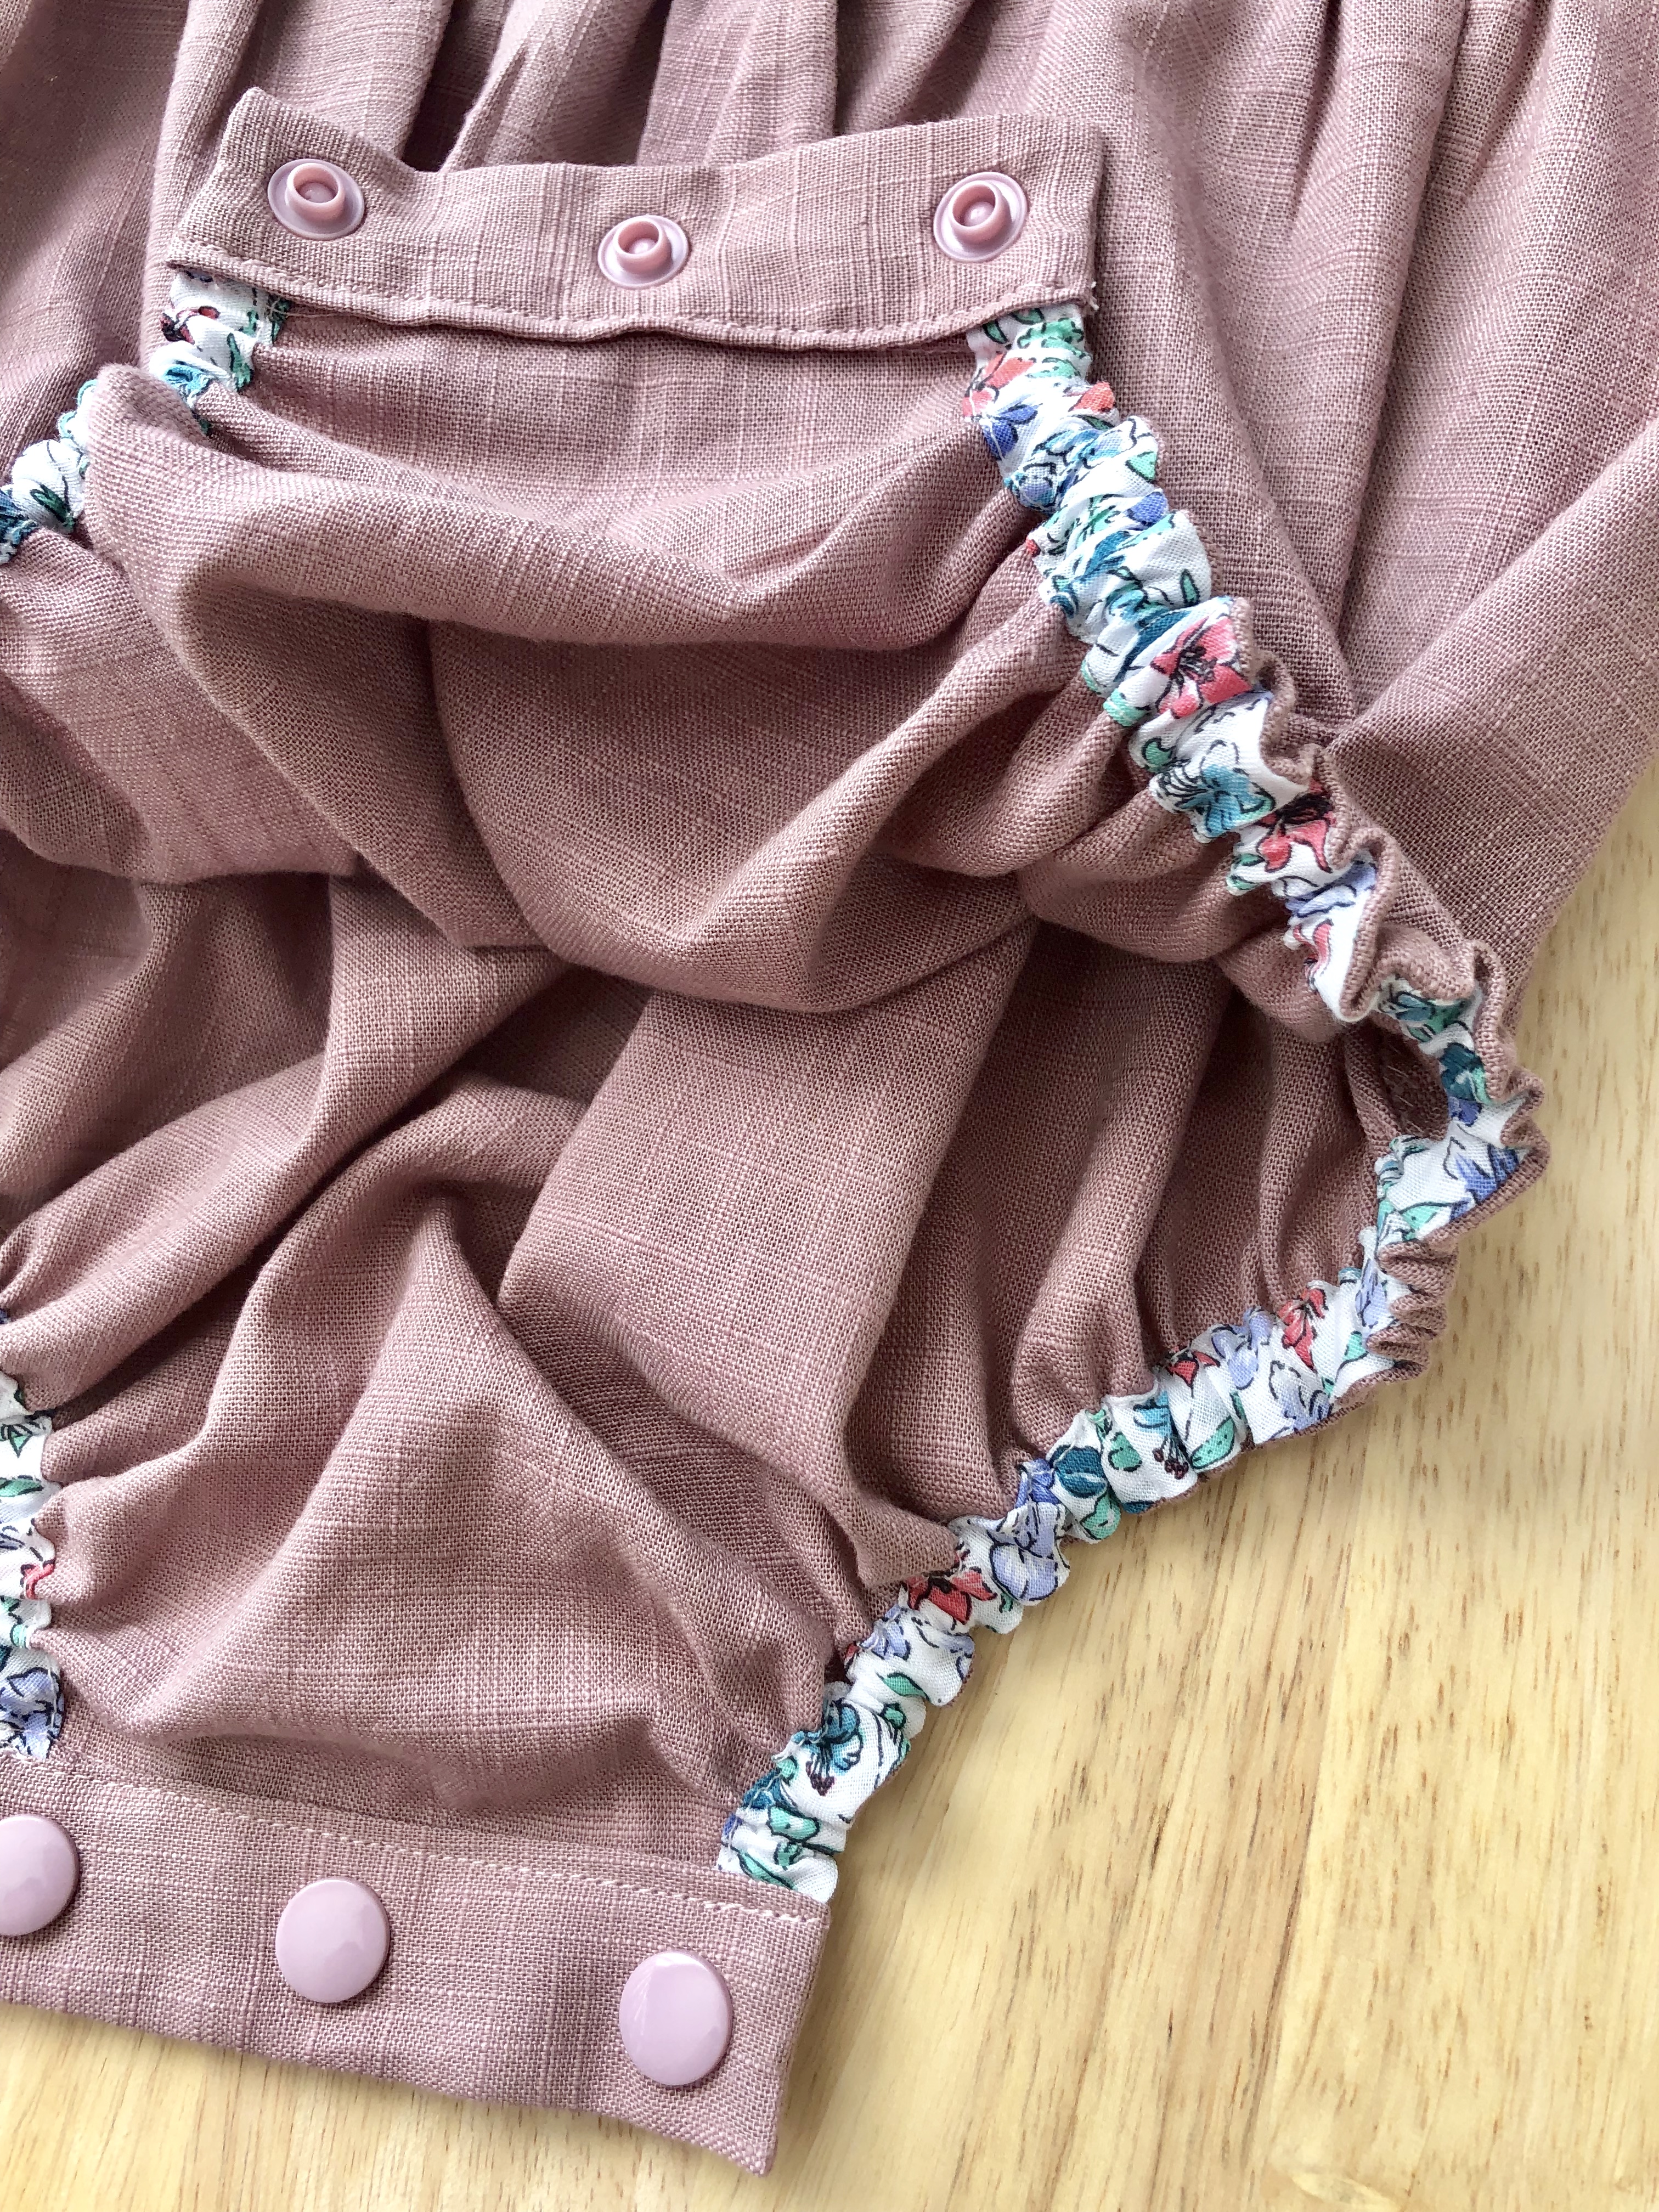
The shorts are, again, very simply drafted, with a loose leg and an elasticated waistband. I added a little ribbon tag detail to the pocket, and I think it really elevates the overall look of the shorts.

MBM_Pipit 02

The original design doesn’t come with a pocket pattern, but I knew I would miss them in these shorts. I added the pocket from my Winslow Culottes as I think it’s a really nice shape. I’m so glad I put them in!

MBM_Pipit 06

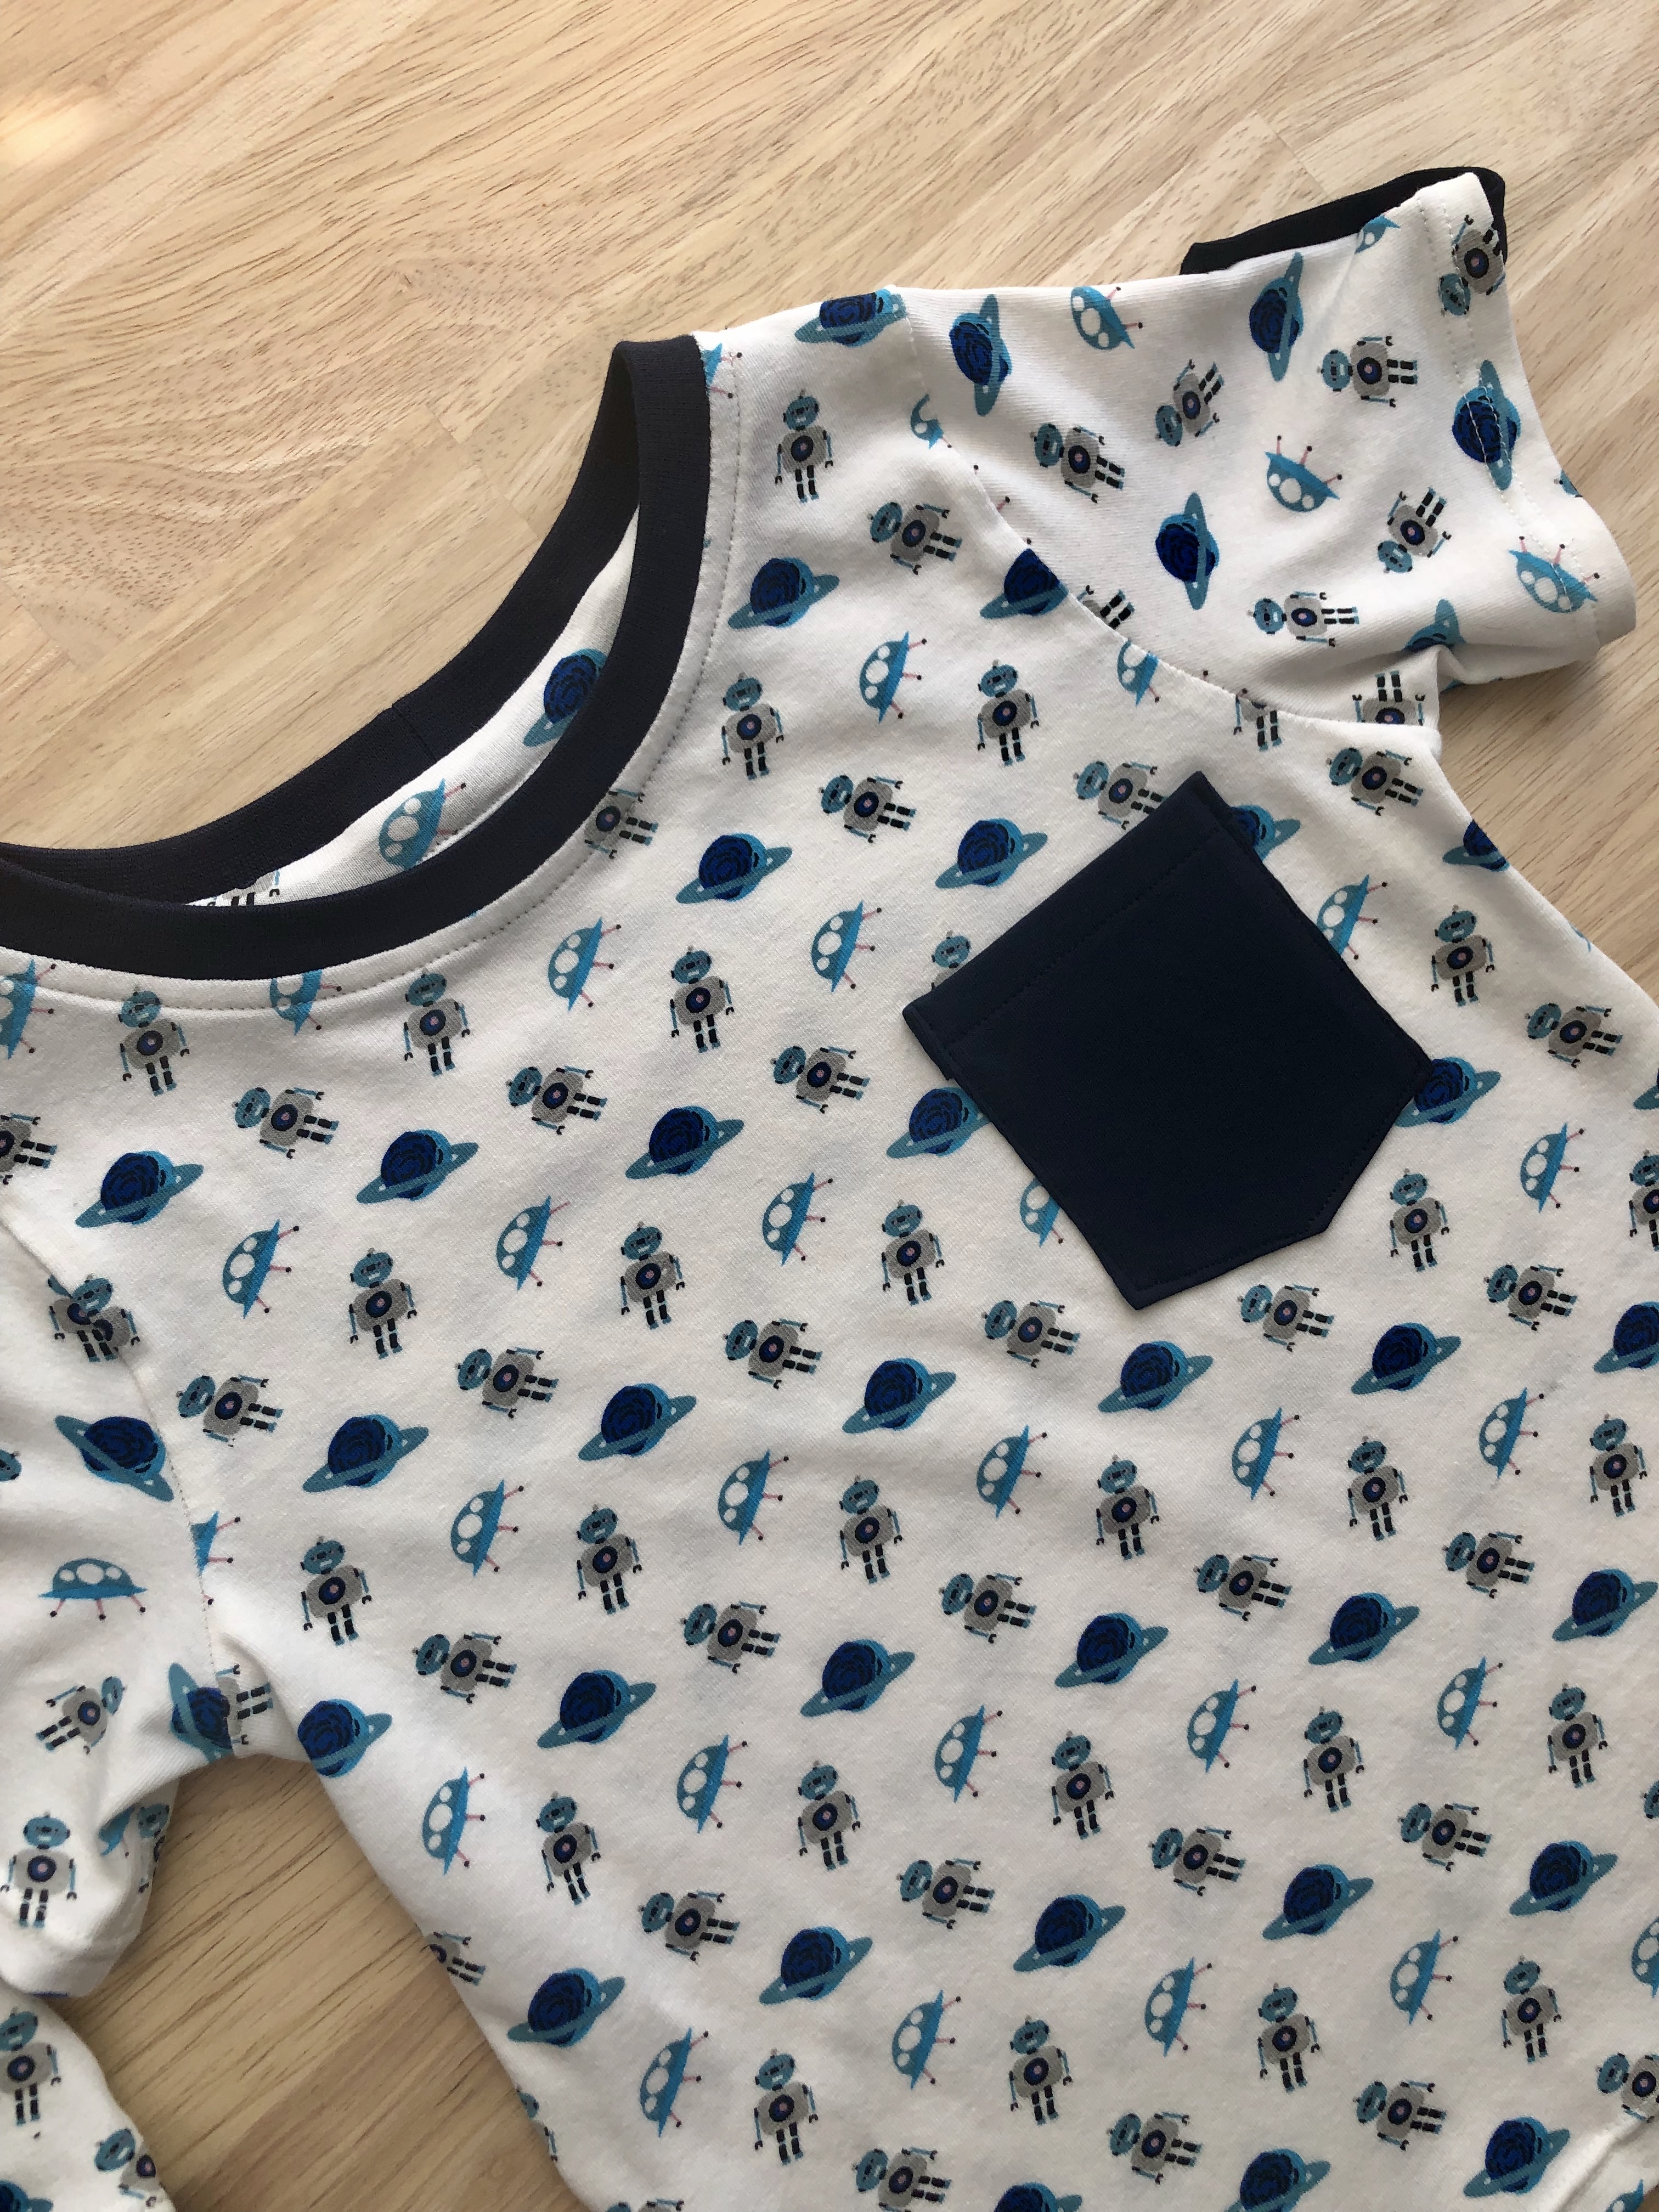
I spent an evening in front of the TV hand stitching the sleeve cuff hem. By doing this, I kept the right side of the cuff looking nice and clean, with no visible topstitching or messy ‘stitch in the ditch’ attempts.

MBM_Pipit 04

My fabric is a lovely, soft double cloth from Spotlight. I haven’t worked with double cloth very much, but it was wonderful. It pressed really well, and the weave is quite dense, so it didn’t fray like crazy.

GARMENT DETAILS

  • Pattern brand/name/number: Pipit Loungewear Set by Common Stitch
  • Style, size: One style, size 12
  • Fabric: Hail Spot printed double cloth in the colour Raspberry from Spotlight
  • Notions: White KAM snaps from Greenbeans Australia, elastic for shorts, iron-on lightweight fusing, grosgrain ribbon for pocket tag, matching thread
  • Modifications/alterations:
    • Used KAM snaps for the closure instead of buttons
    • Added inseam pockets to the shorts
    • Hand stitched up the sleeve cuff hem

I’m so happy with my first make of 2021! I had a feeling that I would love this pattern, so I actually bought more fabric to make a second set! If you’re looking for a quick and easy sewing project, I’d highly recommend the Pipit Loungewear Set.

Mitty x


true scrap busting kensington

MBM_Kensington 01

If last weeks Kensington Romper tickled your scrap-busting fancies, this one will overwhelm them! I bought these two fabrics years apart, but they pair together so well!

MBM_Kensington 02

The bodice is made from a cotton chambray that I bought from The Remnant Warehouse years ago. This length of fabric has gone through so many different forms since then, and I was happy to finally use the last tiny bits for this romper. I added little pin tucks to the front of the bodice which I think turned out super cute.

MBM_Kensington 04

The floral fabric was bought a few months ago to make some bias binding for this project. I could have made more binding from what I had left, but it was so sweet I just had to use it for the bloomer part of the romper.

MBM_Kensington 03

The back is where my lack of fabric is really highlighted. The bloomers are really quite wide, and I didn’t have enough to make it all in the floral fabric. There was just enough of the chambray to patch it all together, and although it doesn’t look as neat as the front, I think it was a good work-around.

GARMENT DETAILS

Even though bub will probably only wear this romper a few times, I feel good knowing that I have used some scraps of fabric that otherwise would have sat in my stash for ages, or eventually made its way to my floor pouf.

Mitty x

kensington romper

MBM_Kensington 05

I’m calling it, sewing clothing for kids is the ultimate scrap buster! I made this adorable romper from the left over bits of my Tokyo Jacket, and I think it’s almost too cute for words!

MBM_Kensington 06

For a real vintage vibe, I added this delicate white lace trim to the bodice. I did this before lining it, so all the stitching is hidden between the layers.

MBM_Kensington 07

I didn’t have enough fabric to add ruffles at the shoulders as written in the pattern. So I just used a straight length of fabric, did a tiny hem on one side, then used box pleats to create this gorgeous accent.

MBM_Kensington 08

I had some self-made bias binding left over from this project, and I thought it would be a nice addition to the romper. I used my trusty KAM press to insert the snaps at the crotch, and the colour match is spot on!

MBM_Kensington 09

I also used the snaps at the back closure, these are so quick and easy to install!

MBM_Kensington 10

I used some white cotton for the bodice lining, and I took my time hand-stitching up the waist hem. I really love spending a bit of time using hand stitching to finish off a project, it certainly makes for a nice clean result.

GARMENT DETAILS

Do you like to save your scraps for projects like this? I have a fairly decent scrap pile, so I’m sure there will be a few more rompers to show you soon.

Mitty x

a matching set

One of my best friends is due to give birth to her second son any day now, so I thought it would be nice to surprise her with a handmade matching set for her boys to wear.

MBM_Set 01

I used two patterns that I’m sure you’ve seen on my blog before; the bodysuit pattern from Brindille and Twig, and the Andover tee from Little Lizard King.

MBM_Set 02

I still think this kind of neckline is one of the best designs for babies. The over-the-shoulder wrap is so flexible and means there isn’t any chance of the suit getting stuck over bubs head.

MBM_Set 03

I picked up this adorable robot and planet printed cotton jersey from Spotlight, and I’m so glad I did, because my friend said that her eldest is robot-mad at the moment, and quickly exclaimed how much he loved his new shirt.

The dark navy accents were left over jersey from when I made 11 of these t-shirts. It’s from MaaiDesign, and is still the best quality jersey I’ve ever worked with.

GARMENT DETAILS:

I love giving handmade gifts, especially for big occasions such as the birth of a baby. I can’t wait to see the boys in their matching outfits!

Mitty x


for lulu

MBM_Astoria 05

Oh, I had fun with this one! This little Astoria Pinafore was a gift for a friend of mine who’s youngest just turned one year old. While I was sewing my last Astoria, I thought it wouldn’t be too difficult to make the dress reversible.

MBM_Astoria 08

The pattern has been designed with a fully lined bodice, so all I had to add was a second skirt in fabric matching the lining. I also decided to use my KAM snaps for the closure instead of buttons. This meant that I could colour coordinate the snaps for either side of the dress.

MBM_Astoria 09

I really enjoyed picking the fabric for this outfit. I started off with the mustard floral print, then I chose a complimentary solid coloured linen/cotton blend for the second side.

MBM_Astoria 11

Even though there was a little more work involved, I think it was totally worth it! I can’t wait to see Lulu in both versions over the warmer months.

GARMENT DETAILS

  • Pattern brand/name/number: Astoria Pinafore by Little Lizard King
  • Style, size: Ruffle Bodice Pinafore, size 18 months
  • Fabric: Printed cotton and linen/cotton blend from Spotlight
  • Notions: KAM snaps from Greenbeans Australia, my own woven label, matching thread
  • Modifications/alterations:
    • Made the dress fully reversible by adding a lining to the skirt
    • Used snaps for the back instead of buttons
    • Rounded out the front neckline a little bit

I know there has been a lot of sewing for kids on my blog recently, and I do have a few more things to post about before bub arrives, I hope you are happy to indulge me!

Mitty x

andover dress with ruffles

Following on from my Andover Dress hack, I decided to make another but with an added ruffle. This was a really simple design change, and I’m sure it could be used on a number of patterns.

MBM_Andover Dress 04

I took my modified bodice front and back pieces and found the halfway point of the shoulder seam. From there, I drew a straight line down to the waistline seam.

MBM_Andover Dress 05

This split the bodice piece so there was a center panel that would be cut on the fold, and two side panels (if you try this, don’t forget to add seam allowance back into your pattern!). In between these panels, I added a cute little ruffle. I was going to make it one layer of fabric and turn the raw edge under, but it looked a bit scrappy. Instead, I sewed two ruffle pieces together, right sides facing along the curved edge, turned it right sides out, and topstitched along the curved edge.

MBM_Andover Dress 06

The ruffle extends over to the back of the dress as well, making a really nice wing detail at the top of the shoulder.

MBM_Andover Dress 07

GARMENT DETAILS

  • Pattern brand/name/number: Originally the Andover Tee by Little Lizard King, which I hacked into a dress
  • Style/size: Ruffle bodice, short sleeve version, size 18 months
  • Fabric: Cotton jersey and ribbing for neckband from Spotlight
  • Notions: Matching thread, my personal label at the bottom of the skirt
  • Modifications/alterations:
    • Slashed the bodice pieces to add in a ruffle that starts at the front and extends to the back over the shoulder
    • Covered the back neckline ribbing with a strip of matching jersey

Little Miss certainly has a nice handmade wardrobe in the making, and I’m not about to stop sewing now!

Mitty x

astoria pinafore

I wonder if all this sewing for bub, in sizes so far in the future, is classed as nesting?

MBM_Astoria 01

I found this beautiful scrap of cotton in my stash and I thought it would be perfect to test out the Astoria Pinafore from Little Lizard King.

MBM_Astoria 04

I only just managed to squeeze this out of the fabric I had. The skirt isn’t as full as written in the pattern, and I had to piece together one side of the back waistband, and a small portion of the strap. Luckily, the printed design is rather busy, so it’s not too noticeable.

MBM_Astoria 02

I added some white grosgrain ribbon to the bodice, and along the bottom of the skirt. I tried to sew it on as straight as possible, and I think the overall effect is quite nice.

MBM_Astoria 03

The pattern calls for buttons at the closures, but I decided to use my KAM snap press instead (I didn’t like my chances of sewing neat buttonholes over the join in the waistband). The press is so easy to use, if you are going to be making a lot of children’s clothes, I highly recommend that you invest in one. I got mine from Greenbeans Australia.

GARMENT DETAILS

  • Pattern brand/name/number: Astoria by Little Lizard King
  • Style, size: Simple Pinafore, size 18 months
  • Fabric: Printed cotton and white cotton for lining from my stash
  • Notions: KAM snaps from Greenbeans Australia, white grosgrain ribbon, matching thread
  • Modifications/alterations: 
    • Used KAM snaps instead of buttons

Overall, I am very happy with this pattern. I’d like to make the ruffle version too, it looks very cute!

Mitty x

andover hack

I’m currently 32w + 6d into my pregnancy, and possibly planning too far ahead because I just made a dress to fit an 18-month-old!

MBM_Andover Dress 01

I used the Andover Tee pattern to make this little dress, and I think it worked out really well. It was a very simple modification; first I had to cut the front and back pattern pieces straight across (mirroring the hemline) a few centimetres below the armholes.

MBM_Andover Dress 02

The skirt pattern is a simple rectangle. I wanted a bit of a gathered effect, so I made the width of the skirt 1.5 times the length of the adjoining bodice seam, and 30cm long. I also added an extra inch for the hem, to give the bottom of the skirt a bit of weight.

MBM_Andover Dress 03

The finishing touch was this little woven label from Kylie and the Machine, it says “One Of A Kind”, which I’m sure my little girl will be!

GARMENT DETAILS

  • Pattern brand/name/number: Andover Tee by Little Lizard King
  • Style/size: Short-sleeve tee with regular neckband, size 18 months
  • Fabric: Printed jersey and pink ribbing from Spotlight (same fabric as this project)
  • Notions: Woven label from Kylie and the Machine, matching thread
  • Modifications/alterations: 
    • Turned the tee into a dress pattern as described above
    • Added a strip of jersey to cover and reinforce the back neckband

This was a very quick and satisfying project! I’ve already redrawn the bodice pattern to add a cute ruffle, I hope to show you that next week.

Mitty x

baby sheets and my first quilt

With baby’s expected arrival only a few weeks away, I had a sudden urge to sew some bassinette sheets.

MBM_Sheet Pattern

I made a simple pattern by measuring the bassinette mattress, then I added 9cm to each side of the rectangle to go down the walls of the mattress and wrap under it. Once cut out of the fabric, I sewed the side walls together, right sides facing.

MBM_Sheets 04

I finished the edge of the sheets with some fold over elastic. This was so easy to do, and I think it gives a very clean finish.

MBM_Sheets 01

When picking the fabric for these sheets, I started by selecting this printed cotton, then chose colours and prints that matched it.

MBM_Sheets 02

This yellow print is especially cute.

MBM_Sheets 03

This green fabric has a mottled polka dot print, and it was actually the most expensive fabric of the lot. I think once bub is out of the bassinette I’ll repurpose these sheets into something she can wear (I want to get as much mileage out of this fabric as possible!).

I had an idea to use the small square offcuts made from cutting the sheets, and turn them into a matching quilt. I bought more fabric than I needed for the sheets with the quilt in mind (1 meter of each print, plus some solid colour fat quarters).

MBM_Quilt 01

I decided on a simple pattern, using a half-square-triangle design. It’s just the right size for the bassinette, so pretty small when it comes to quilts, but I feel this is a great beginner size.

MBM_Quilt 04

I managed to get some points matching up really well!

MBM_Quilt 05

Others, not so much! Haha! But I really don’t mind, I think little quirks like this add to the personality of the piece.

MBM_Quilt 02

For the actual quilting step, I kept it very simple and just highlighted the design. I did this, not only because I have a standard sewing machine, but I really wasn’t confident in quilting a free-hand pattern. I used a white thread in the top of my machine, and a pink/maroon thread in the bobbin.

MBM_Quilt 03

I cut a very small straight-grain binding, only 1 inch wide. I used my machine to sew the binding rights sides facing to the front, then turned it under and hand-stitched it to the back of the quilt. This gave me a lot of control over the mitred corners, and I really love a bit of hand finishing.

MBM_Sheets 05

I’m thrilled with this little set and I had such a great time making the quilt. I have so many half-square-triangles left over, I’m having a hard time deciding what to make from them. Clearly another quilt, but I think I can also make a cushion cover to match this set.

As I mentioned, this was my first attempt at making a quilt, and while I had a vague idea of what to do, I found Youtube to be a wonderful learning resource. I especially enjoyed watching The Midnight Quilt Show (while quilting, of course), and this video by Fons & Porter really helped with getting a clean finish on the binding corners.

GARMENT DETAILS

I loved sewing this project, and I think you will agree that the finished result is pretty cute! I’ll be back soon to show you what I made from all the left-over quilting bits.

Mitty x

a few andover tees

August is my sons birthday month, and with all the sewing I’ve been doing for bub recently, I thought I should probably make something for him too.

MBM_Andover 01

I wanted a pattern that was simple, practical, and easy to customise. I decided on the Andover Tee from Little Lizard King. It has two different sleeve and neckline options, and cute additional details like a pocket and sleeve tabs. Plus, it comes in a huge size range, from 12 months right up to 14 years!

MBM_Andover 02

For the fabric, I purchased 3 meters of cotton jersey from Maaidesign, 1 meter each of white, navy and paprika. This stuff is absolutely glorious! It’s by far the best quality jersey I have ever worked with. It is thick and buttery and beautiful, I want to make all my t-shirts from it now!

They also stock matching ribbing (for some colours), which is incredible! The colour match is so perfect, and you can buy it in small quantities for neckbands or cuffs.

MBM_Andover 18

I knew I wanted to use the fabrics together to create some really unique shirts, so I jumped into Procreate on the iPad and spent much more time than I’m willing to admit playing around with all the colour combinations.

I chose three navy body mock-ups, and tried to select shirts with different features. I did this for the white and paprika colours too.

MBM_Andover 11

MBM_Andover 10

MBM_Andover 09

Here are the white designs I picked…

MBM_Andover 05

MBM_Andover 04

MBM_Andover 03

… and the paprika.

MBM_Andover 08

MBM_Andover 07

MBM_Andover 06

Even after all these shirts, I still had some fabric left! I wanted to use as much of it as possible, so I managed to patch together the following two shirts.

MBM_Andover 13

MBM_Andover 12

This last one happens to be my favourite out of the whole lot! I love how all the colours work together, and the patchwork is very striking.

MBM_Andover 14

As you can see, I really liked adding these little pockets. They are the perfect size for holding rocks and matchbox cars. I also covered the back neckline of each of the shirts with matching jersey. I find this really elevates the overall look of the shirt, while also providing a bit of stability to an area that gets a lot of wear and tear.

MBM_Andover 15

The sleeve tabs are a great way to add a bit of personality to the shirt. None of my tabs actually open though, I just used the buttons to hold the tab in place.

MBM_Andover 16

My attempts at inserting the henley placket were… interesting. I clearly need more practice but I actually found it rather difficult to keep everything in place, and not have it all become too bulky. You can see in my colour sketches that I planned on using the henley placket quite a bit, but after I did two, I decided against doing the rest.

MBM_Andover 17

The last little thing I added to the shirts was a small folded piece of grosgrain ribbon, to act as a tag. It’s completely useless, but I think it makes the shirt look much more professional.

They all need a bit of an iron (they’ve only just come off my sewing machine), but I am so happy with how they turned out! My son is going to have a very cohesive Spring/Summer wardrobe this year!

GARMENT DETAILS

  • Pattern brand/name/number: Andover Tee by Little Lizard King
  • Style/size: Size 3
  • Fabric: Cotton jersey and matching ribbing in the colours navy, white and paprika from Maaidesign
  • Notions: Buttons from my stash, press studs for the henley plackets from my stash, grosgrain ribbon from E&M Greenfields, matching thread
  • Modifications/alterations:
    • Added the back neck binding cover to all shirts
    • Sewed the side seams at 5mm to add a tiny bit more ease
    • Didn’t make the sleeve tabs functional
    • Added in small grosgrain tags

Now to wrap them all for my son to open on his birthday! I hope he likes them as much as I do.

Mitty x